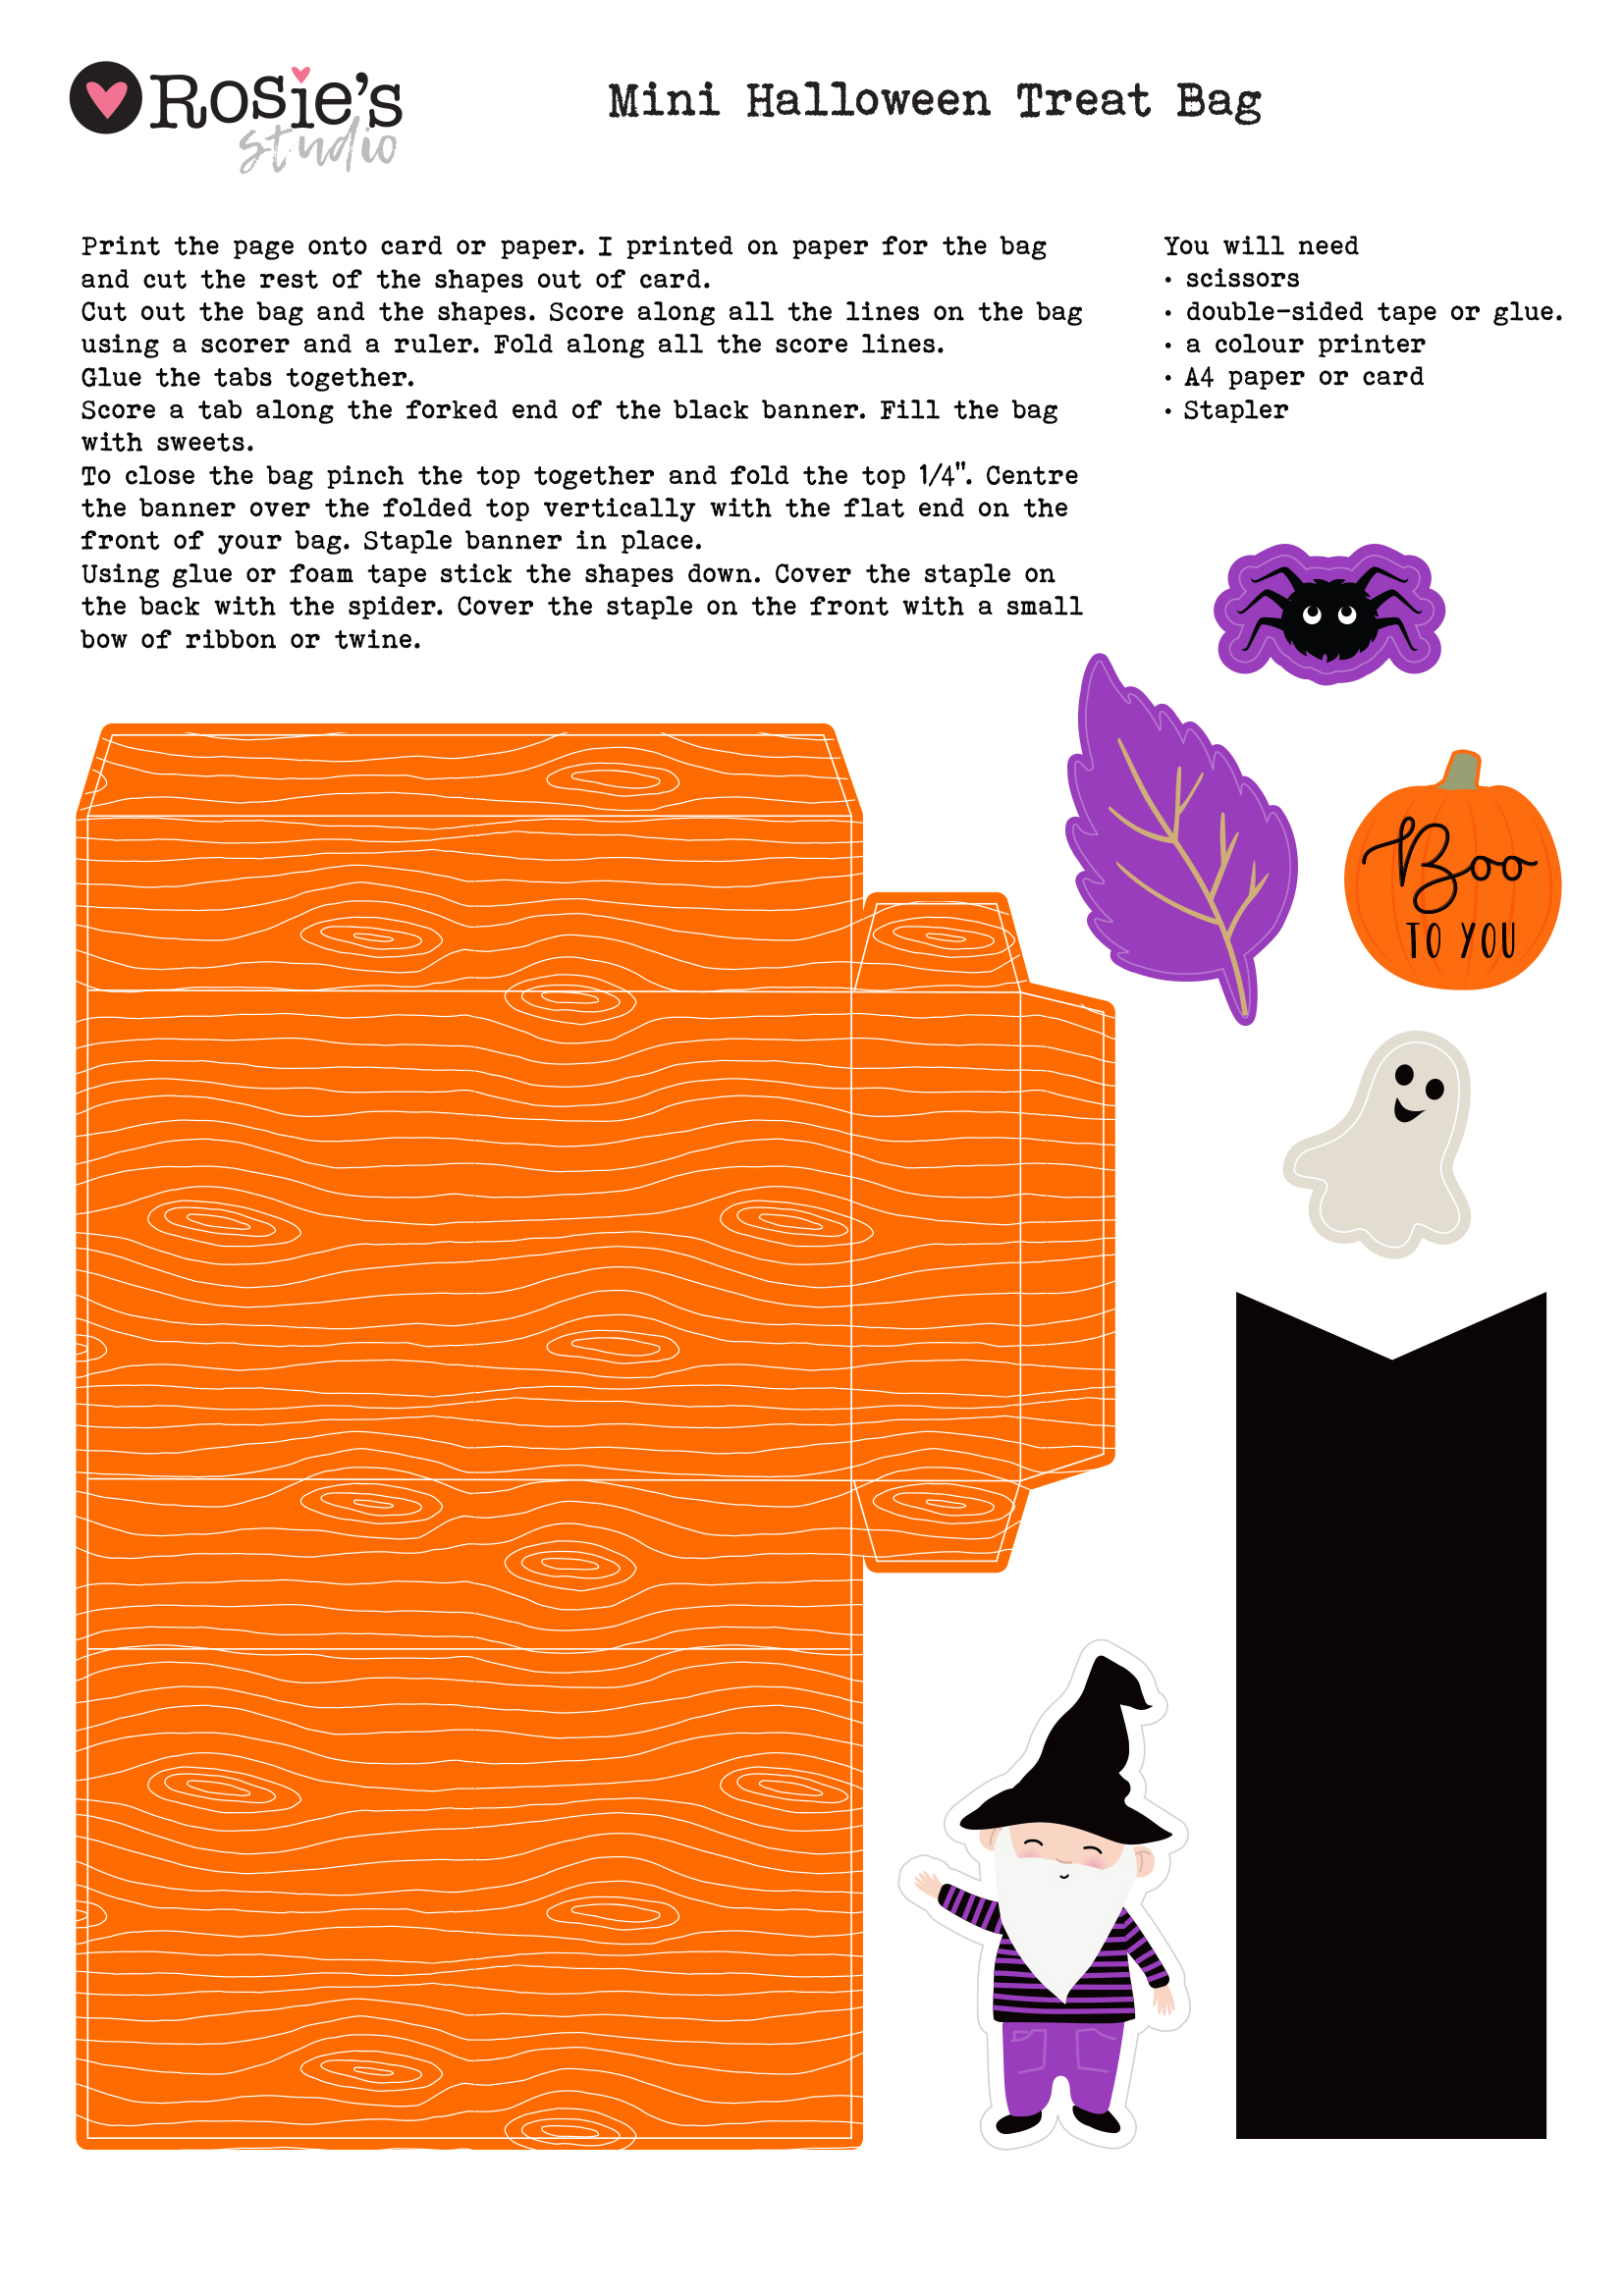
You will need: • scissors • double-sided tape or glue • a colour printer • A4 paper or card • Stapler
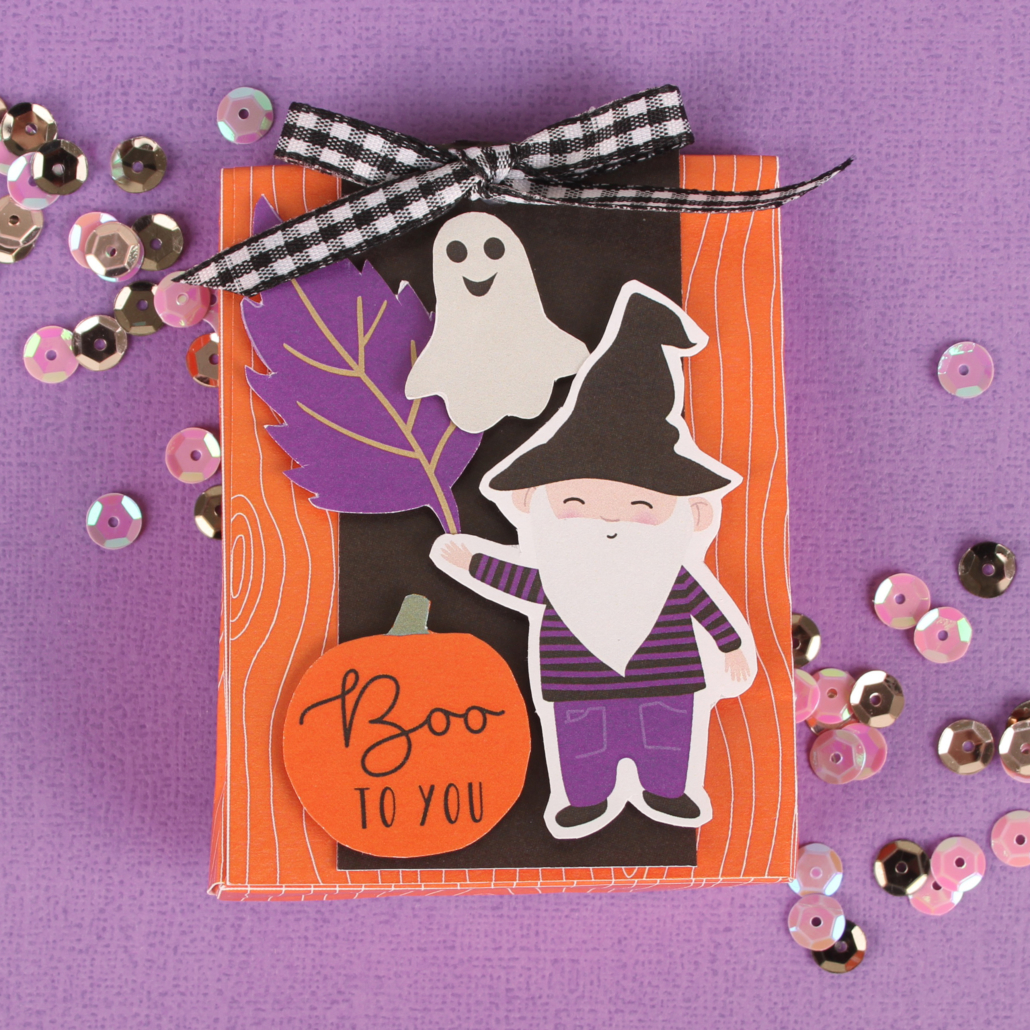
Make this cute little DIY Mini Halloween Treat Bag for your halloween party, or as favours for your kids to give to their friends at school. It’s the perfect size to pop just a few sweets in. You might recognise the adorable gnome who appeared in our Rosie’s Studio Field Notes collection, he’s all dressed up for halloween!
Instructions:
Print the page onto card or paper. I printed on paper for the bag and cut the rest of the shapes out of card. Cut out the bag and the shapes. Score along all the lines on the bag using a scorer and a ruler. Fold along all the score lines. Glue the tabs together. Score a tab along the forked end of the black banner. Fill the bag with sweets. To close the bag pinch the top together and fold the top 1/4”. Centre the banner over the folded top vertically with the flat end on the front of your bag. Staple banner in place. Using glue or foam tape stick the shapes down. Cover the staple on the back with the spider. Cover the staple on the front with a small bow of ribbon or twine.