How to start making handmade cards
Rosie’s Studio designer Tracy Britton gives you the run down on making simple cards at home.
How do you start making handmade cards at home and what supplies do you need for card-making? The quick answer is you only need a few things when starting out: plain card stock or pre-made blank cards, diecut ephemera and adhesive tapes are all you really need.
There are so many ways to make handmade cards, highly embellished and technical or simple and quick can be equally beautiful.
Before working for Rosie’s Studio, I often made simple cards for friends and family, but was by no means an expert card-maker (I was a “last minute card in a panic” card-maker).
When I began designing collections for Rosie’s Studio I started paying a lot more attention to card-making, to help me design elements that were fun and versatile for other card-makers to use.
Eight years later I still make a lot of last minute cards, but now I have a few layouts I can fall back on and they look far more polished.
Read on for the details of what I use, as well as three easy designs you can start with.
EASY CARD-MAKING IDEAS
These days I can’t imagine giving someone a birthday card that hasn’t been handmade by me. I make thank you and birthday cards for workmates and friends, little handmade cards for my husband to say “I love you”; there’s so many reasons to give people cards; and when you’ve gone to the effort to make them yourself they know they’re from the heart.
If you haven’t made them yourself before, or you want some simple card ideas for when you need to make an easy card in a hurry, then read on!
GATHER YOUR TOOLS
Gather up your crafting tools and get yourself organised, below is a list of essential tools you need to get started when card-making. You can expand on these tools later, but for now here’s the basics…
BASIC CARD-MAKING TOOLS:
Steel rulers that are nice and heavy are best when cutting paper with a craft knife.
Plastic or wooden rulers are easy to ruin by cutting into the edge with your knife, and metal rulers that are too light tend to slip across your paper, making it hard to cut a straight line.
Buy one with both inches and mm on and check to make sure they both measure from left to right so that you can convert metric to imperial at a glance.
The self-healing cutting mats are the best type of cutting mat to buy, when you cut into them the cut disappears, the mat isn’t damaged and doesn’t affect other projects you make on it. They feel softer to cut on and are less prone to your work sliding around as you cut than harder cutting mats. If you don’t have a mat you could try using some thick cardboard that you don’t mind cutting into, in the short term. Take care not to cut through to the surface below.
Aside from your tools, you’ll want a range of card making supplies such as:
CARDSTOCK
I recommend using card stock of around 200-216gsm for the base of your card (gsm refers to the weight of the card for instance photocopy paper is usually 70gsm). 180gsm is fine too, but slightly heavier makes a nicer quality card.
You can buy card stock in various sizes and trim it to the right size for your card.
305 x 305mm (12 x 12″) is a common size, as is A4 (297 x 210mm) and Letter (8.5 x 11″).
You’ll be able to use the offcuts for making tags and smaller gift cards.
You can buy smooth or textured card. I like the linen-look textured card, though I’m sure other card-makers will have their own preferences.
If you buy a mixed 12″ x 12″ pack of coloured card, you’ll have plenty of options to choose from colour-wise depending on the card you’re wanting to make and the colour papers and embellishments you’ve chosen. To start with I recommend having white card, this is the colour you’ll use the most.
ADHESIVES
I use a range of adhesives.
Using all three types of adhesives above will create dimension.
Dimension really helps make even the simplest card design stunning.
Tacky glue dries clear, allows for repositioning of elements and dries relatively quickly. I like to use it on things like wood veneer embellishments and thicker card-stock. I don’t use it on papers lower than 180 gsm as the papers may warp a little.
Good quality foam tape and double-sided tapes are essential for the perfect card.
Double-sided is my go-to for glueing papers to the card, as they stay nice and flat, don’t ever warp and they make for a very stable card. Unlike roller glue, don’t tend to come unstuck.
Foam tapes are fantastic for adding dimension, though they can also come unglued over time (some people like to add a drop of tacky glue to the embellishment they’re sticking down, just to make sure it stays put).
OTHER HANDY TOOLS I RECOMMEND:
A paper creaser is a plastic tool for scoring an indent onto the card where you want to fold it.
Also called a scoring tool or bone folder.
Use the edge of the tool to gently burnish the card’s spine flat.
If you purchase a scoring board you’ll find they come with their own scoring tool that fits perfecty into the board’s grooves.
A scoring board is a board with ridges at fixed intervals that run vertically down the board.
I highly recommend purchasing one if you’re going to get into card-making, as they’ll make your cards appear professional and make measuring and folding the cards so easy.
Paper trimmers are super handy and do away with a lot of measuring and craft knife cutting. For that reason they’re a great option for children, or if you’re accident prone like me!
Now you have all your tools sorted and gathered, lets give you some tips on making an easy grab-and-run card!
NB: You can find various score boards with their own trimmer and scoring tool as an all-in-one product.
MAKING YOUR SIMPLE DIY CARD BASE
Using the tools outlined above add some diecut ephemera, patterned papers (152 x 152mm /6 x 6″) and plain cardstock as the card base.
Remember you can use these techniques with whatever you have on hand, wrapping paper, images cut from magazines or old books, hand drawn images you’ve cut out yourself…
Start by cutting a piece of plain white cardstock into a rectangle measuring 210 x 148 mm (8 1/4 x 5 7/8″).
Score a line in the cardstock with a scoring tool at 105 mm (4 1/8″) down the 210 mm (8 1/4″) width.
Fold the card and burnish the folded edge gently to make it sit flat.
You will be left with a folded card of 105 mm x 148 mm (4 1/8 x 5 7/8″).
This size card fits perfectly into a C6 envelope.
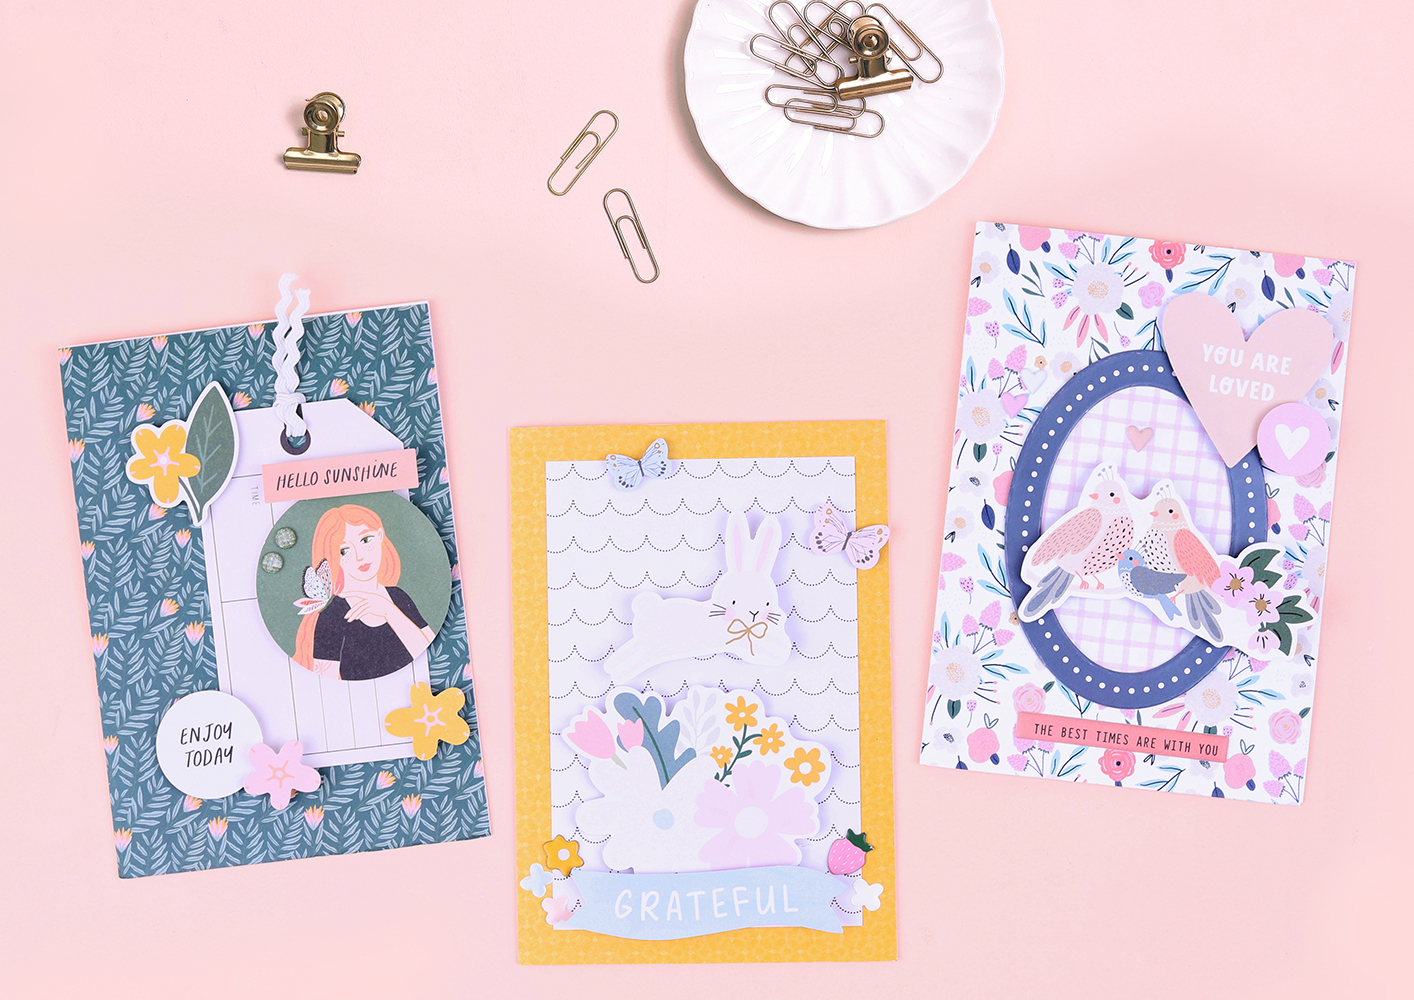
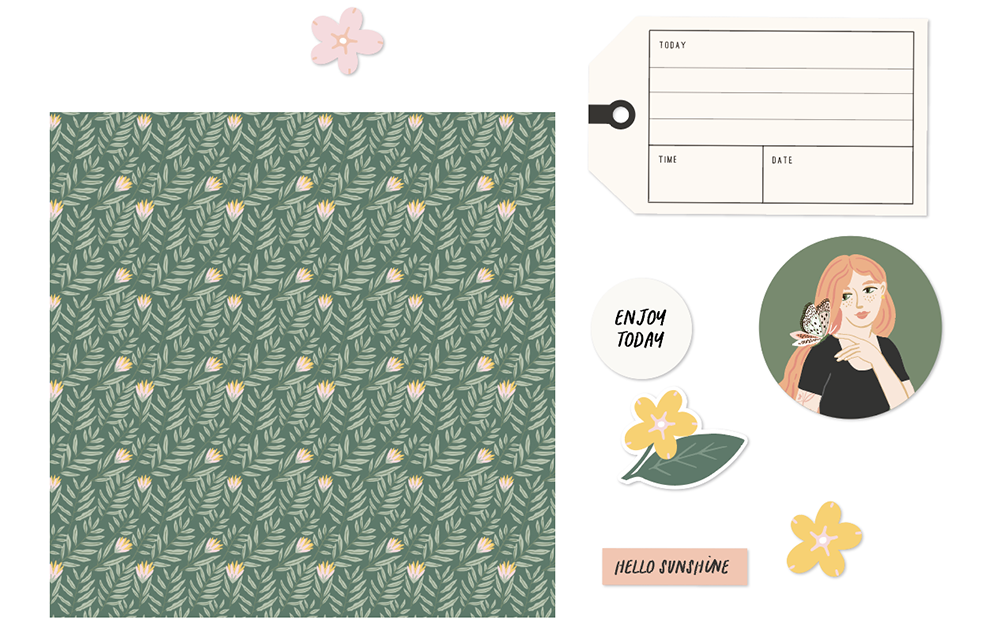
EASY TAG CARD – Rosie’s Studio Nurtured Collection
A tag with elements layered on top makes a fantastic and easy card.
I chose a tag from our Nurtured range.
Rosie’s Studio often include tags in our ephemera, we also have some collections with tags as a separate product.
If you don’t have a tag, you could always cut out a piece of paper the same size and layer on top.
Firstly I cut a piece of patterned 6×6 paper to 105mm x 148mm )4 1/8 x 5 7/8″).
I used double-sided tape to stick the paper to the card. This makes a good solid base from your card.
You could use glue tape, but I find double-sided tape is less likely to fall apart, especially if you are making your cards well ahead of time.
Choose your ephemera, I start with a sentiment I like and find a large diecut that works well with it.
For this card I chose two sentiments (as they were quite small) and made sure they “made sense” grouped together.
I then chose some smaller pieces of ephemera as accents.
You could try using gemstones (I used some from Hearth + Home), puffy stickers or other types of embellishments instead of the flowers I used.
I also chose some ric-rac ribbon to thread though the top of the tag.
Next work out where you’re going to place the tag, sentiments and other ephemera.
I decided to place the tag off to the right on my card and then balance my design with the accents pieces.
Tags also work really well centred on the card, there are no hard and fast rules about where you want the focus to be.
I also took the time to work out what I would stick down with double-sided tape, and what I would use foam tape under.
The I worked from the lower layers up, sticking down each piece.
NB: Chipboard embellishments and puffy stickers can be really helpful in creating dimension.
The dimension is what really creates interest in your design, rather than everything looking flat.
The other two cards I created used our Frolic and Better Together collections.
SIMPLE CARD with PAPERS – Rosie’s Studio Frolic Collection
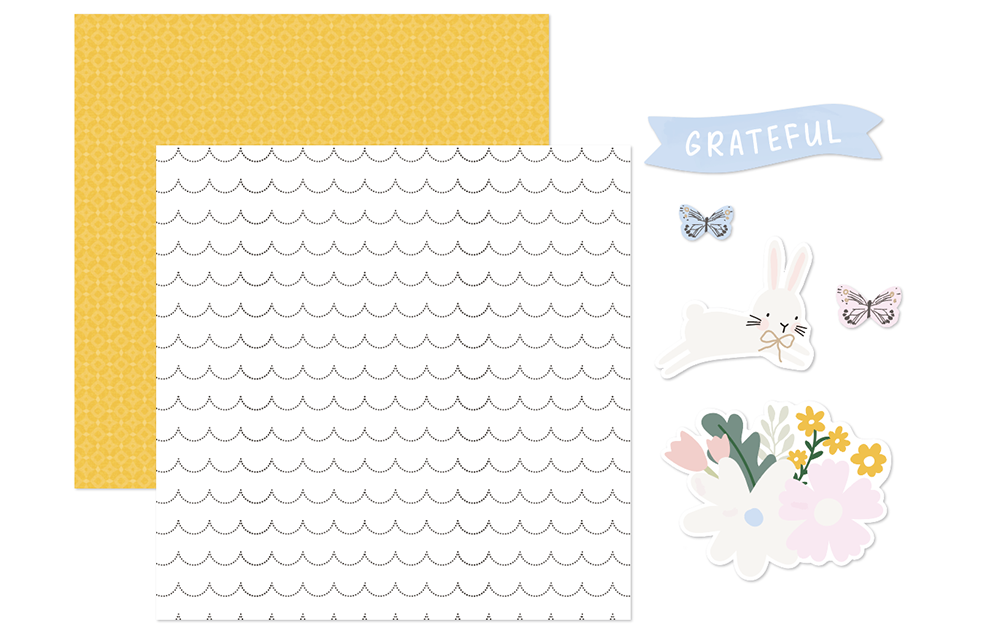
For Frolic I used a second 6×6 paper cutting it 20mm or 6/8″ less than the card’s front on both the width and length, and fixing it to the centre of the card.
I used a bright paper in yellow for the base paper on the card, and for the smaller top paper I chose a plainer design.
You can play around with patterns and papers and see what works in what order.
NB: This is a great way to use those papers you love, that are very busy, underneath a “background” paper that is plainer and that your diecuts will stand out off.
The ephemera are all placed in the centre of this card working up from the bottom to the top 1/3.
I then placed the tiny butterfly accents at angles so that there was a bit of movement in the design. Lastly I added some enamels and a little chipboard flowers and strawberry.
Chipboard Frame Card – Rosie’s Studio Better Together Collection
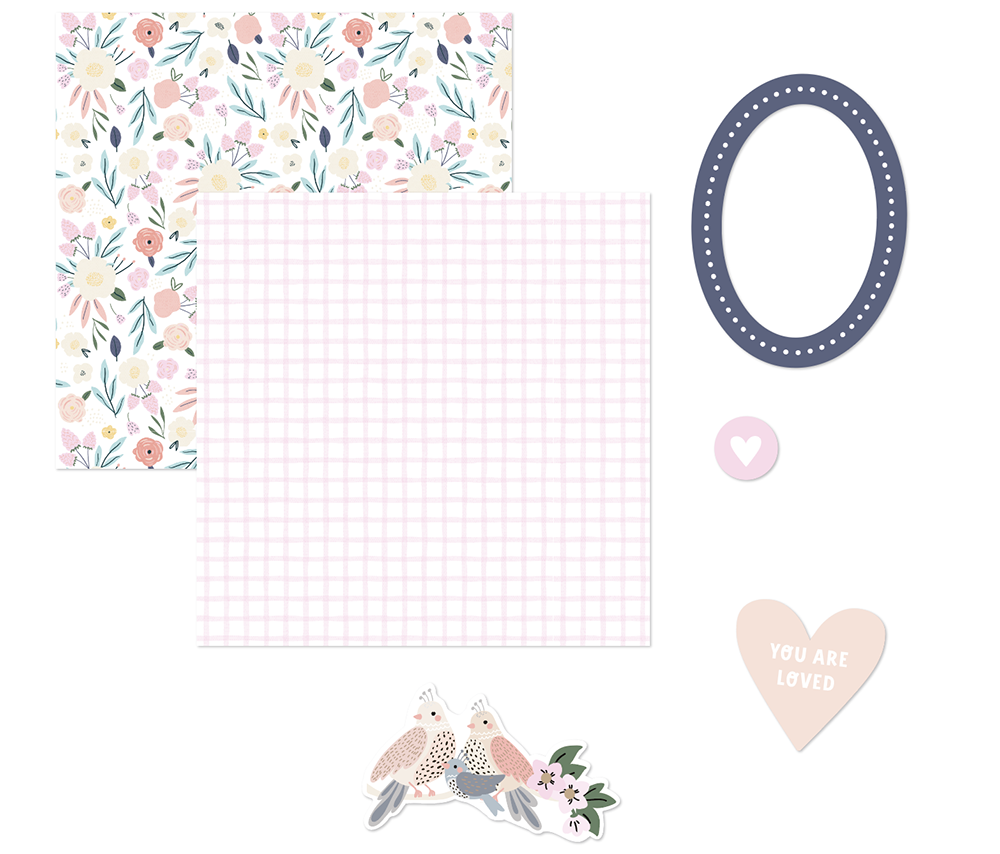
For the Better Together card I decided my focal point would be a chipboard frame.
I placed another 6×6 paper pattern behind the frame that I cut out to fit.
The bird family went nicely with the phrase “you are loved”, I placed them so they were in the centre of the oval frame, even though the diecut itself is over to the right on the card. I also chose a sentiment from our puffy stickers from Better Together which I placed underneath the frame.
These instructions for a simple card can be used with any Rosie’s Studio collection, or any papers and ephemera you have at home.
You can use the same principal and really get creative adding clusters of diecuts and embellishments to create highly layered and embellished designs.
Remember: a handmade card doesn’t need to be a perfect card when it’s made with love.