Scrapbooking is a great way to preserve memories and tell a story through photos and creative elements. With Rosie’s Studio products, you can create a beautiful and unique 12×12″ scrapbook layout that will showcase your memories in a fun and creative way. Here’s how you can create your own layout using Rosie’s Studio products…
The first step in creating a scrapbook layout is to choose the photos you want to use. Select photos that tell a story or capture a special moment. You can choose as many photos as you can fit on your page. You might choose to use several smaller photos, 2-3 medium photos, or 1 large photo.
STEP 2: CHOOSE YOUR PAPERS
Rosie’s Studio offers a wide variety of patterned and plain papers that you can use to create your layout. Choose a few that coordinate with your photos and will help to tell your story. For this layout, you will need two 12×12″ patterned papers and one 12×12″ plain cardstock sheet. Cardstock is thicker than scrapbooking paper and makes a sturdy background for your layout.
STEP 3: CUT YOUR PAPERS
Cut your patterned papers into pieces that are slightly larger than your photos. This will create a fun and interesting background for your photos. Use glue or double-sided tape to stick them to your plain paper. You can also cut some of the patterned paper into smaller pieces to use as accents on your layout.
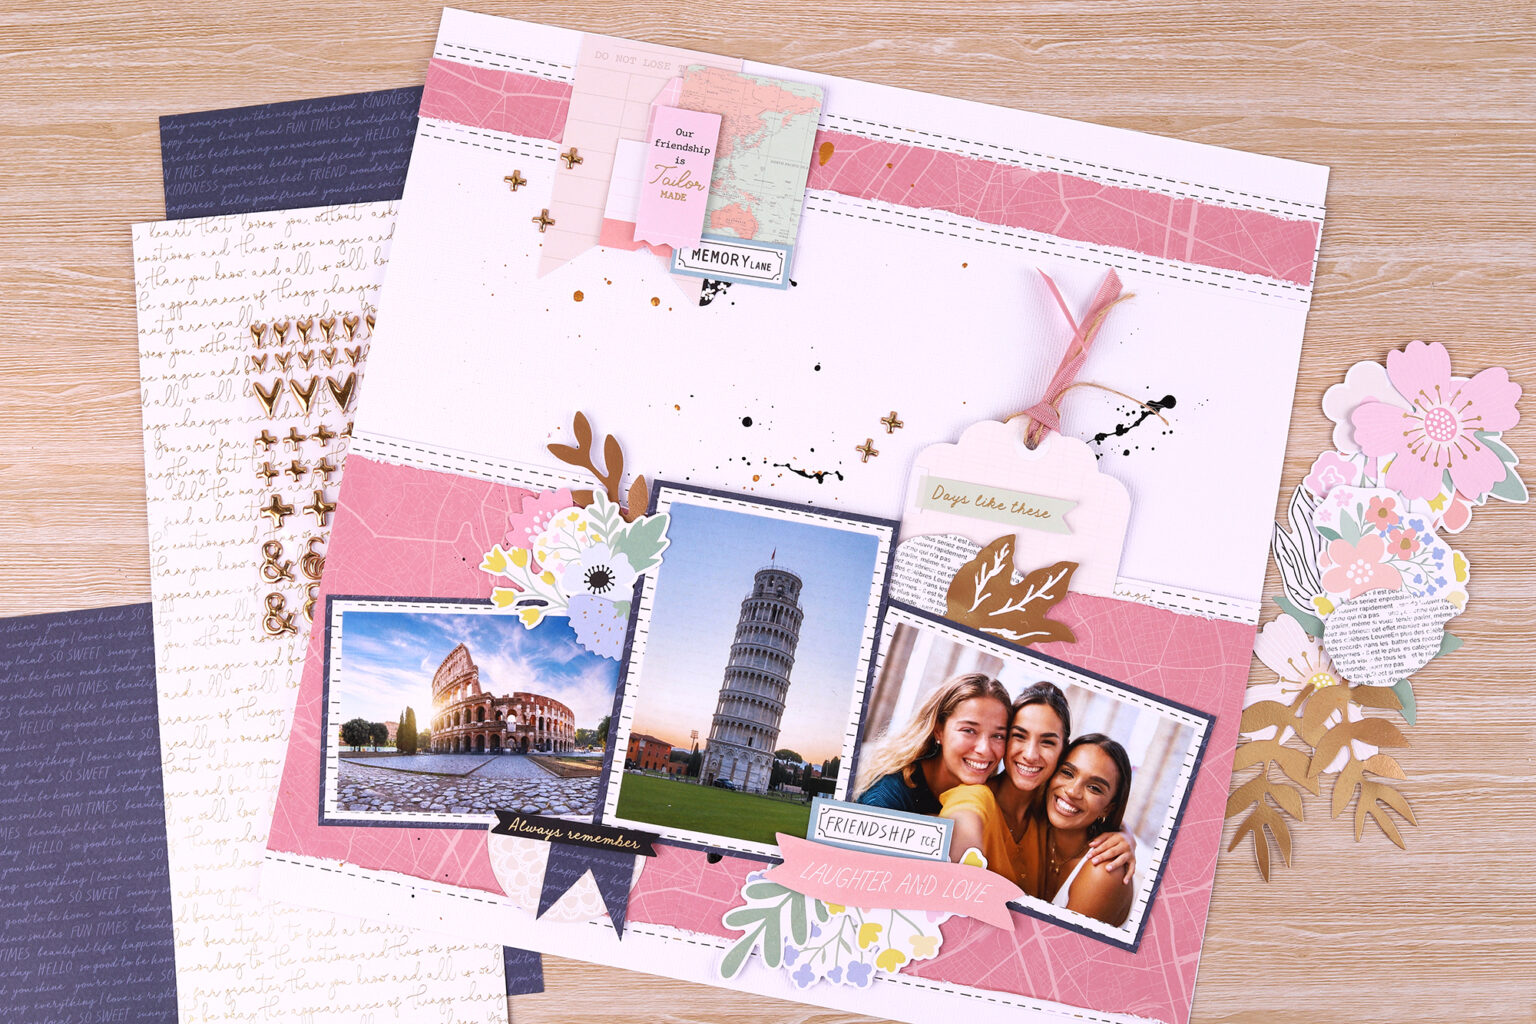
For the 12×12 background, cut strips of 12×12 patterned paper to layer and add an interesting textural base.
We cut two full width white patterned strips that were 35mm deep and 145mm deep. As well as two full width pink patterned strips that were 24mm and 133mm deep. We then distressed the horizontal edges of the pink paper using a paper distressing tool.
STEP 4: STICK YOUR PAPERS DOWN
Using double-sided tape, firmly stick the papers onto your 12×12 cardstock base. Lissa also used some black and gold oxide inks to splatter over the top of her paper base.
STEP 4: ADD YOU PHOTOS
Adhere your photos to your layout using double-sided tape, photo mounts or corners. Try to arrange them in a way that tells a story or captures a special moment.
Here are a few ideas on how to use embellishments:
Use stickers to add phrases or words that relate to your photos. In this layout we have used a large sticker to give our page a title, along with several small stickers that help capture the spirit of the photos.
Add some dimension by layering diecuts, paper flowers or other embellishments on your layout. You can make some of your embellishments really stand out from the ones underneath by sticking them down with foam tape.
Place bigger pieces at the bottom and small ones on top.
Accent the features of your layout using a group of very small embellishments like enamel dots or other small accent stickers, gemstones, or sequins
STEP 7: FINISH YOUR LAYOUT
Once you’re happy with the placement of your photos and embellishments, you can finish your layout by adding any final touches. This might include journaling about your photos or adding some smaller embellishments.
Creating a scrapbook layout using Rosie’s Studio products is a fun and easy way to preserve your memories and showcase your creativity. With a wide variety of papers, stickers, and embellishments to choose from, you can create a layout that is truly unique and special. Head over to SHOP NOW and start exploring our products and create your own beautiful scrapbook layout.
Get 10% Off
Sign up now to receive 10% off your first order, exclusive offers, free printables and updates on new releases!
* Coupon Code will be sent to your email. Valid for first time sign ups. Offer excludes clearance items, shipping and wholesale.