Rosie's Studio
PRINTABLE/DIGITAL COLLECTIONS –
A QUICK GUIDE
Here’s a guide to using our printable/digital collections with your digital cutting machine. At Rosie’s Studios we use a Silhouette Cameo 4, although our files are able to be used with Cricut and Brother machines too.
WHAT YOU GET IN EACH DOWNLOAD
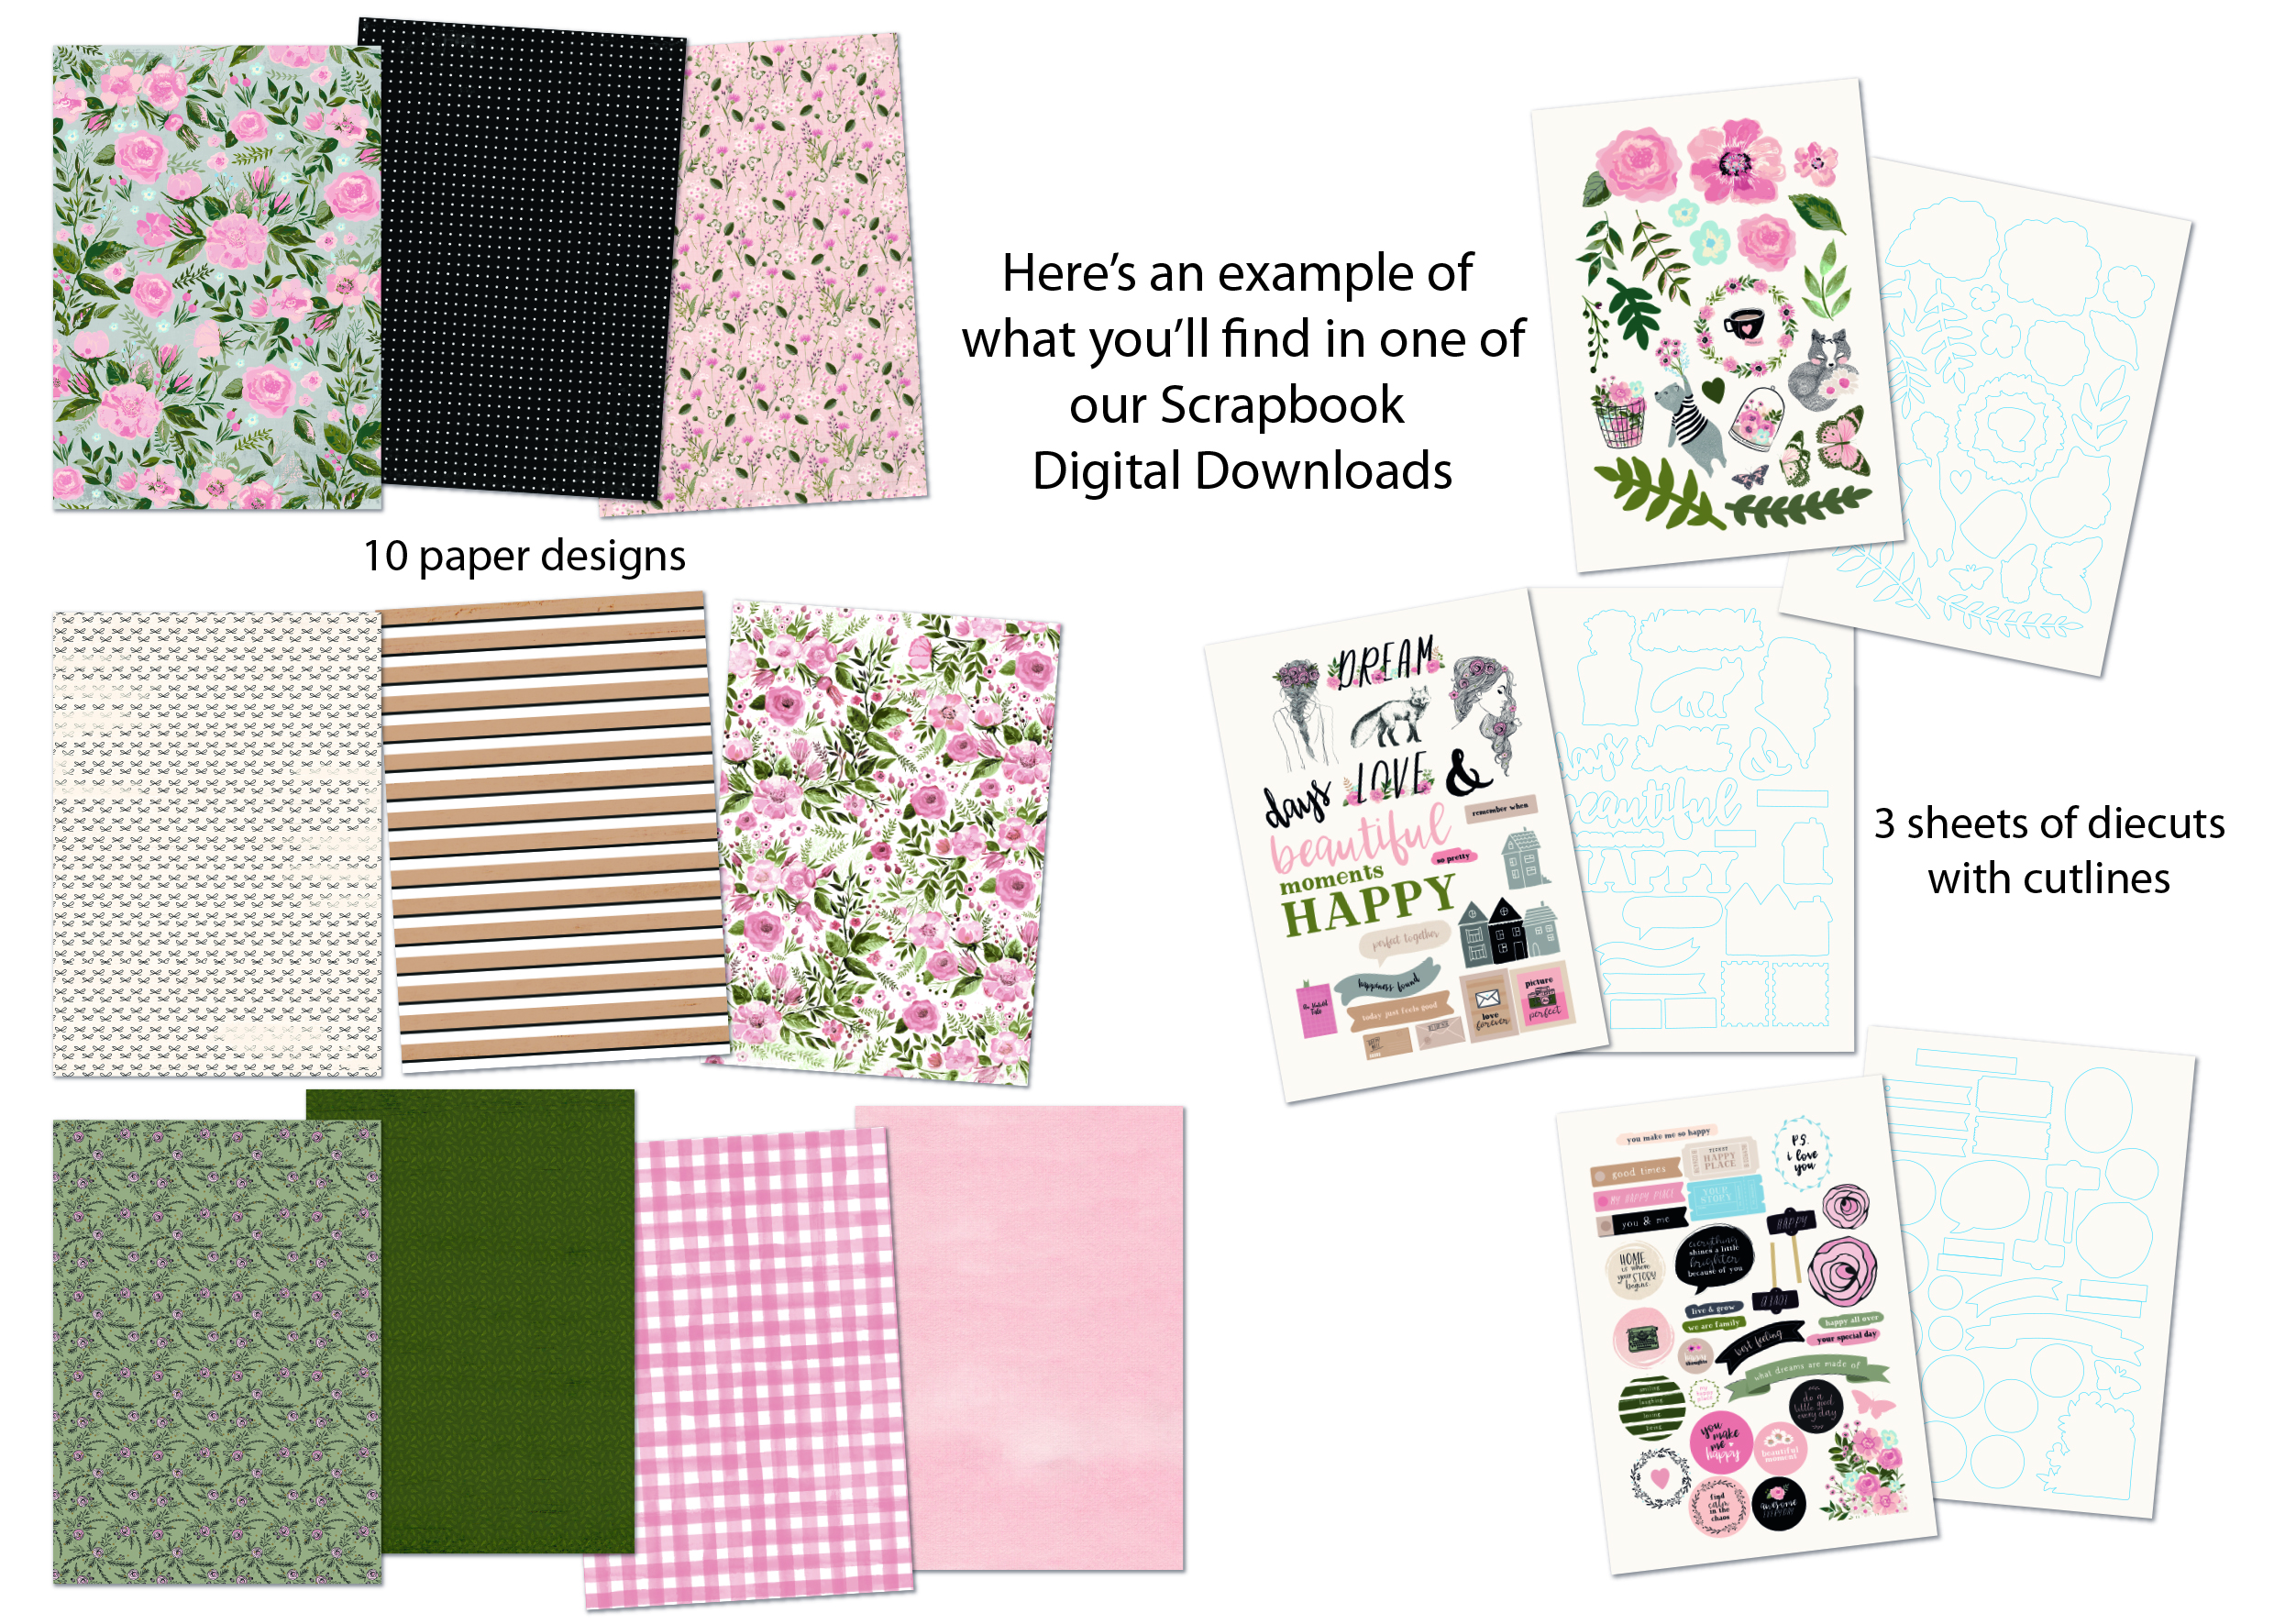
After you purchase your printable collection you’ll be able to download the following files:
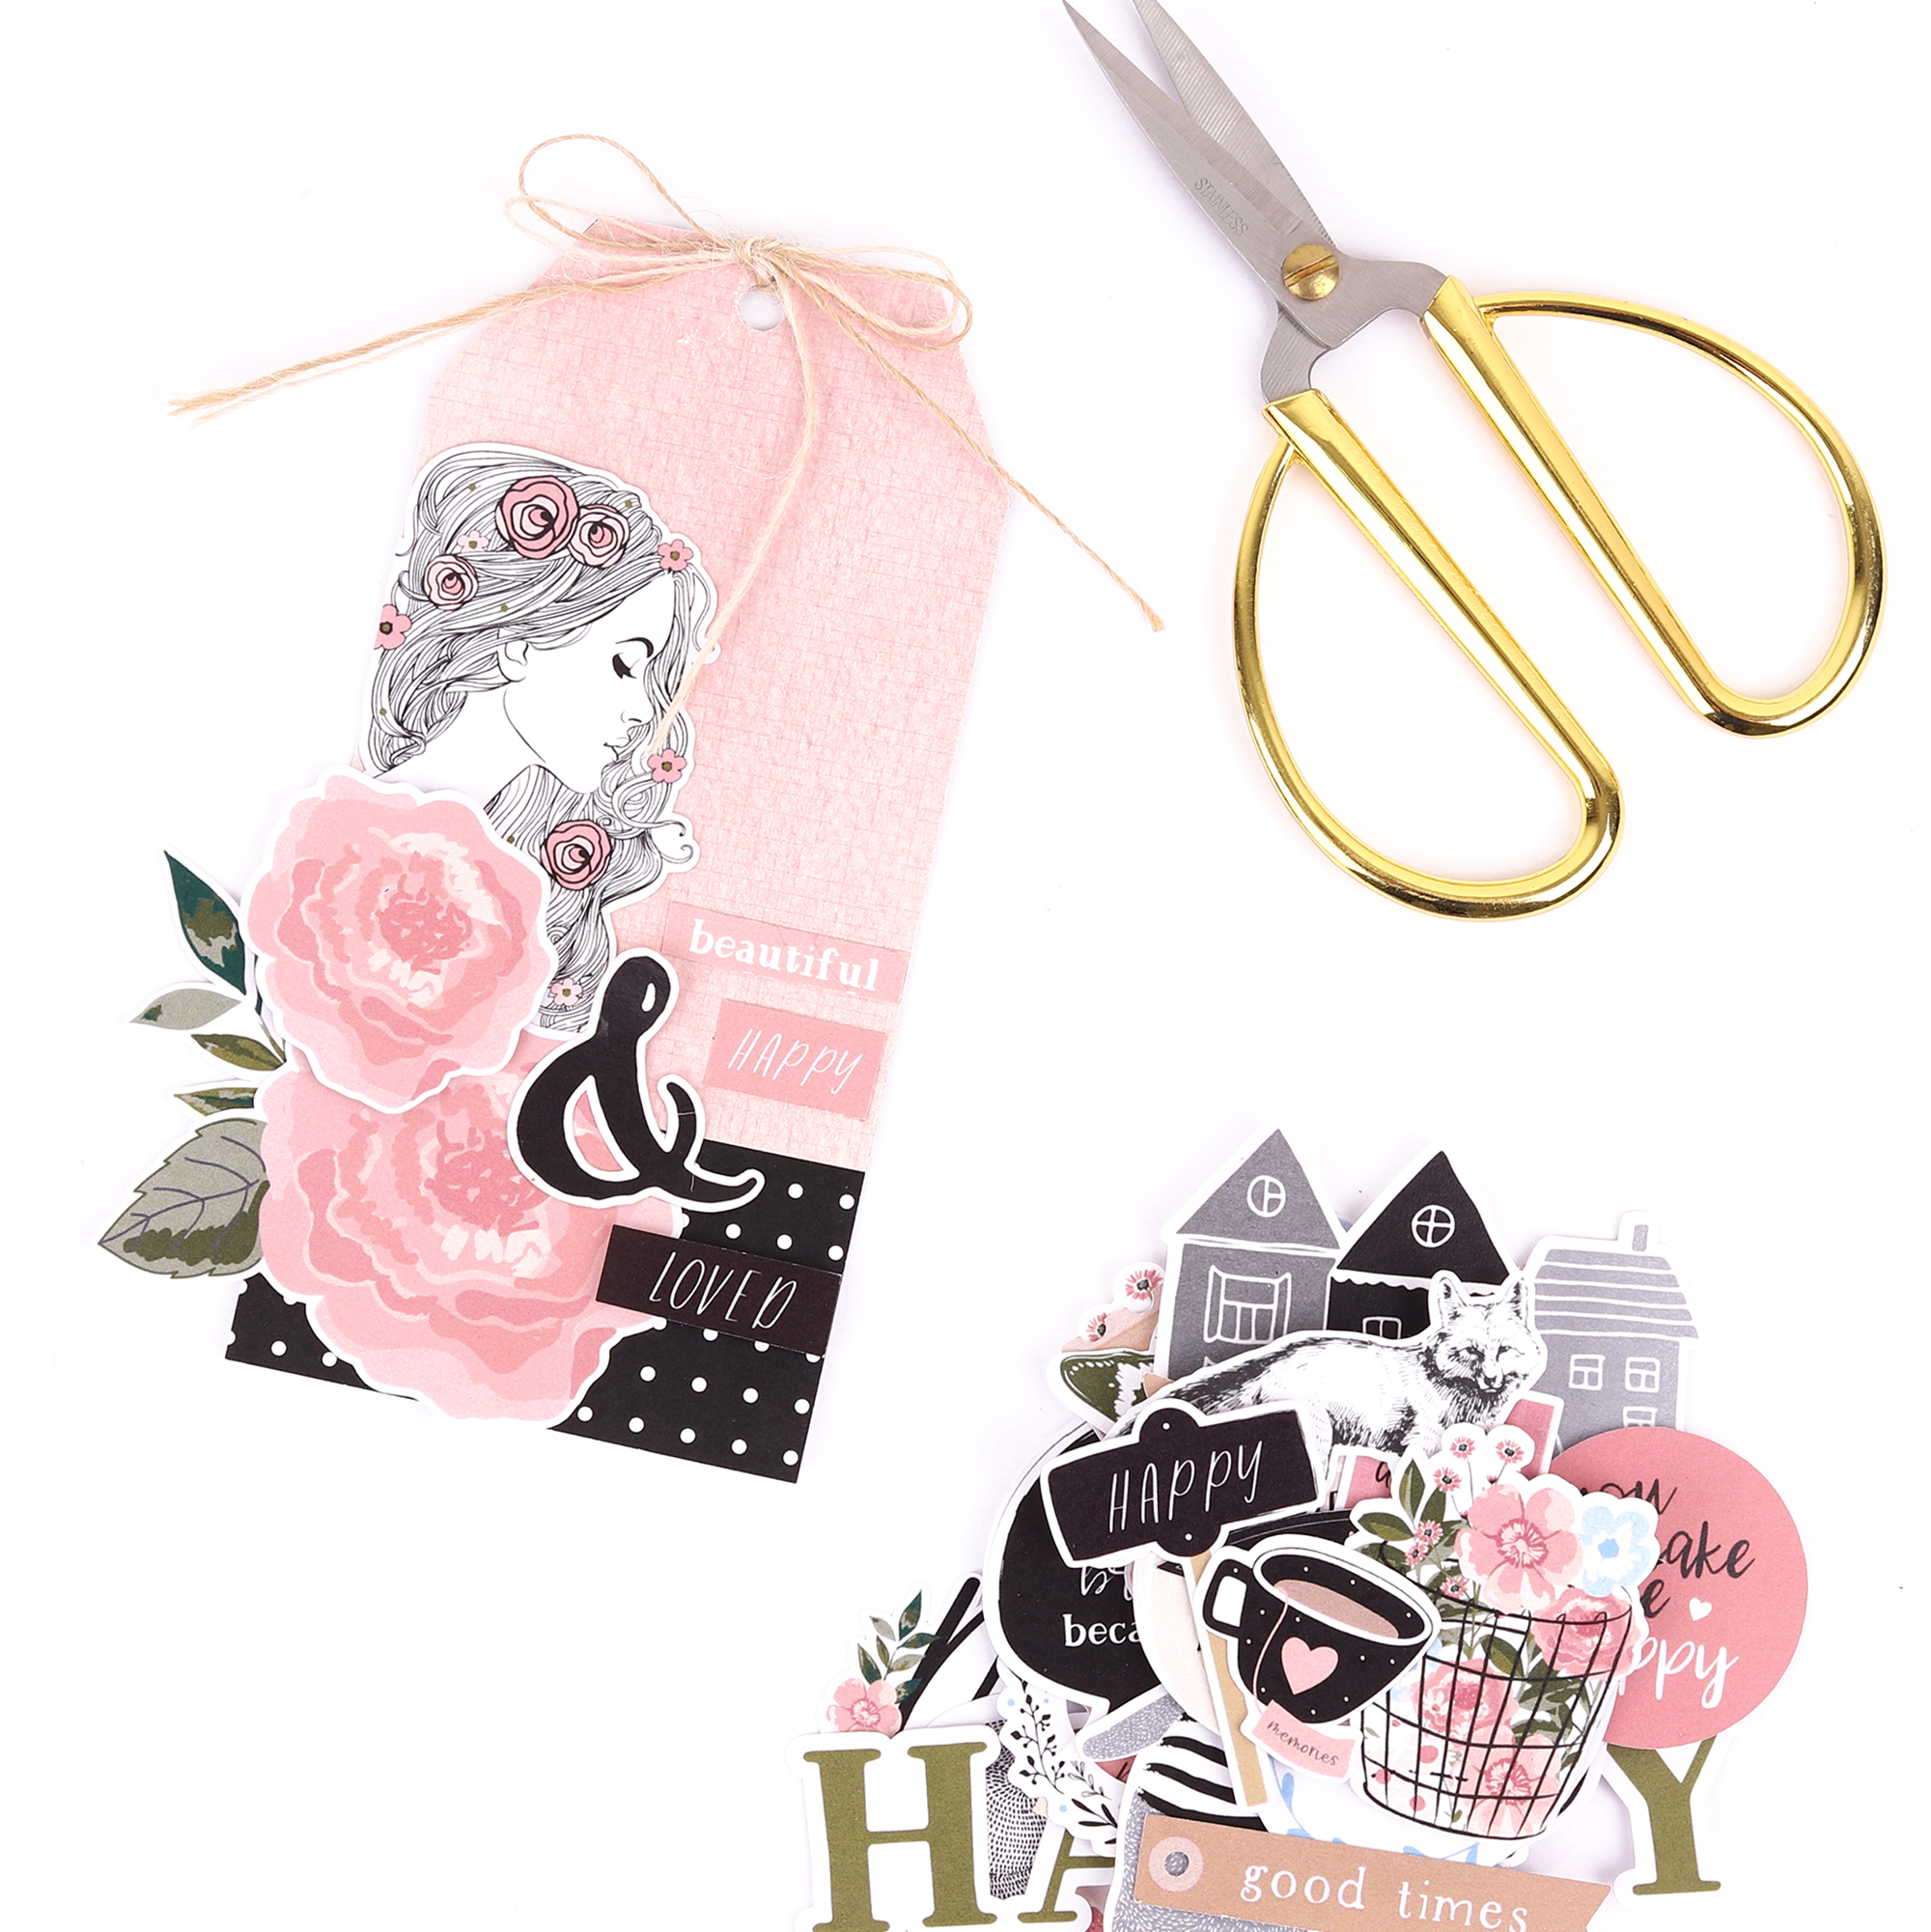
• 3 pages of Digital Diecut Ephemera – jpg format
• 10 designs of Digital Papers – jpg & pdf formats
Both the papers and diecut pages measure 210 mm x 297 mm (A4 size). But you can resize them to fit your paper in your printer settings.
DIGITAL DIECUTS
The diecut ephemera are divided into cutfile lines and diecut pages (images).
DIECUT PAGES (images) come in two formats, jpg for printing out, and png files for digital scrapbooking.
You can print and cut out your diecuts by hand, or you can import the jpg files into the software for your digital cutting machine and cut your files using your machine.
CUTFILE LINES (outlines for cutting) come in dxf and svg formats.
Dxf work with Silhouette, svg with Cricut and Brother’s Scan & Cut can import both types of file.
DIGITAL PAPERS
Digital papers come in jpg and pdf file formats. You can choose to use either of them to print out your papers. Use which format works best with your printer or cutting machine. If you don’t have a cutting machine, you can print them out and trim them by hand.
Depending on what you’re wanting to make; you can scale the papers up or down so you have smaller and larger patterns. It can look effective using the same pattern on a project in different scales, a bit like mixing our 12×12″ printed papers with our 6×6″ papers in the same project.
You can also print the designs out onto different types of paper, e.g. lightweight paper, card, textured papers or vellum.
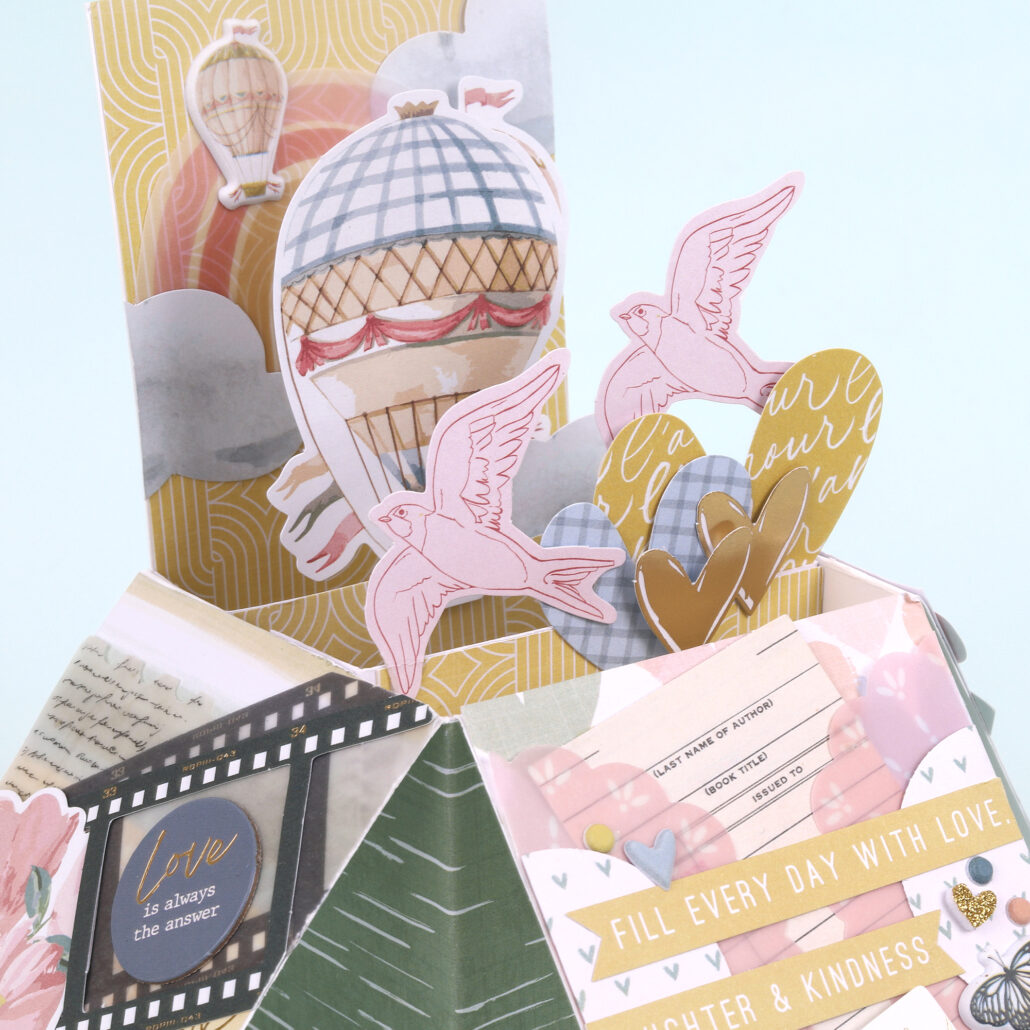
Try doing this with our diecut files too The diecuts would make fantastic stickers.
Remember at 100% the files measure 210 mm x 297 mm (A4), but you can print them on letter size paper or other sizes by selecting “print to fit” in your printer settings.
SILHOUETTE INSTRUCTIONS
Launch the Silhouette Studio software and change the Media Size in Page Setup to A4 (210mm x 297mm).
Open one of the diecut jpgs.
It will import much larger than the media (page) size, you will need to change the image to 210 mm x 297 mm.
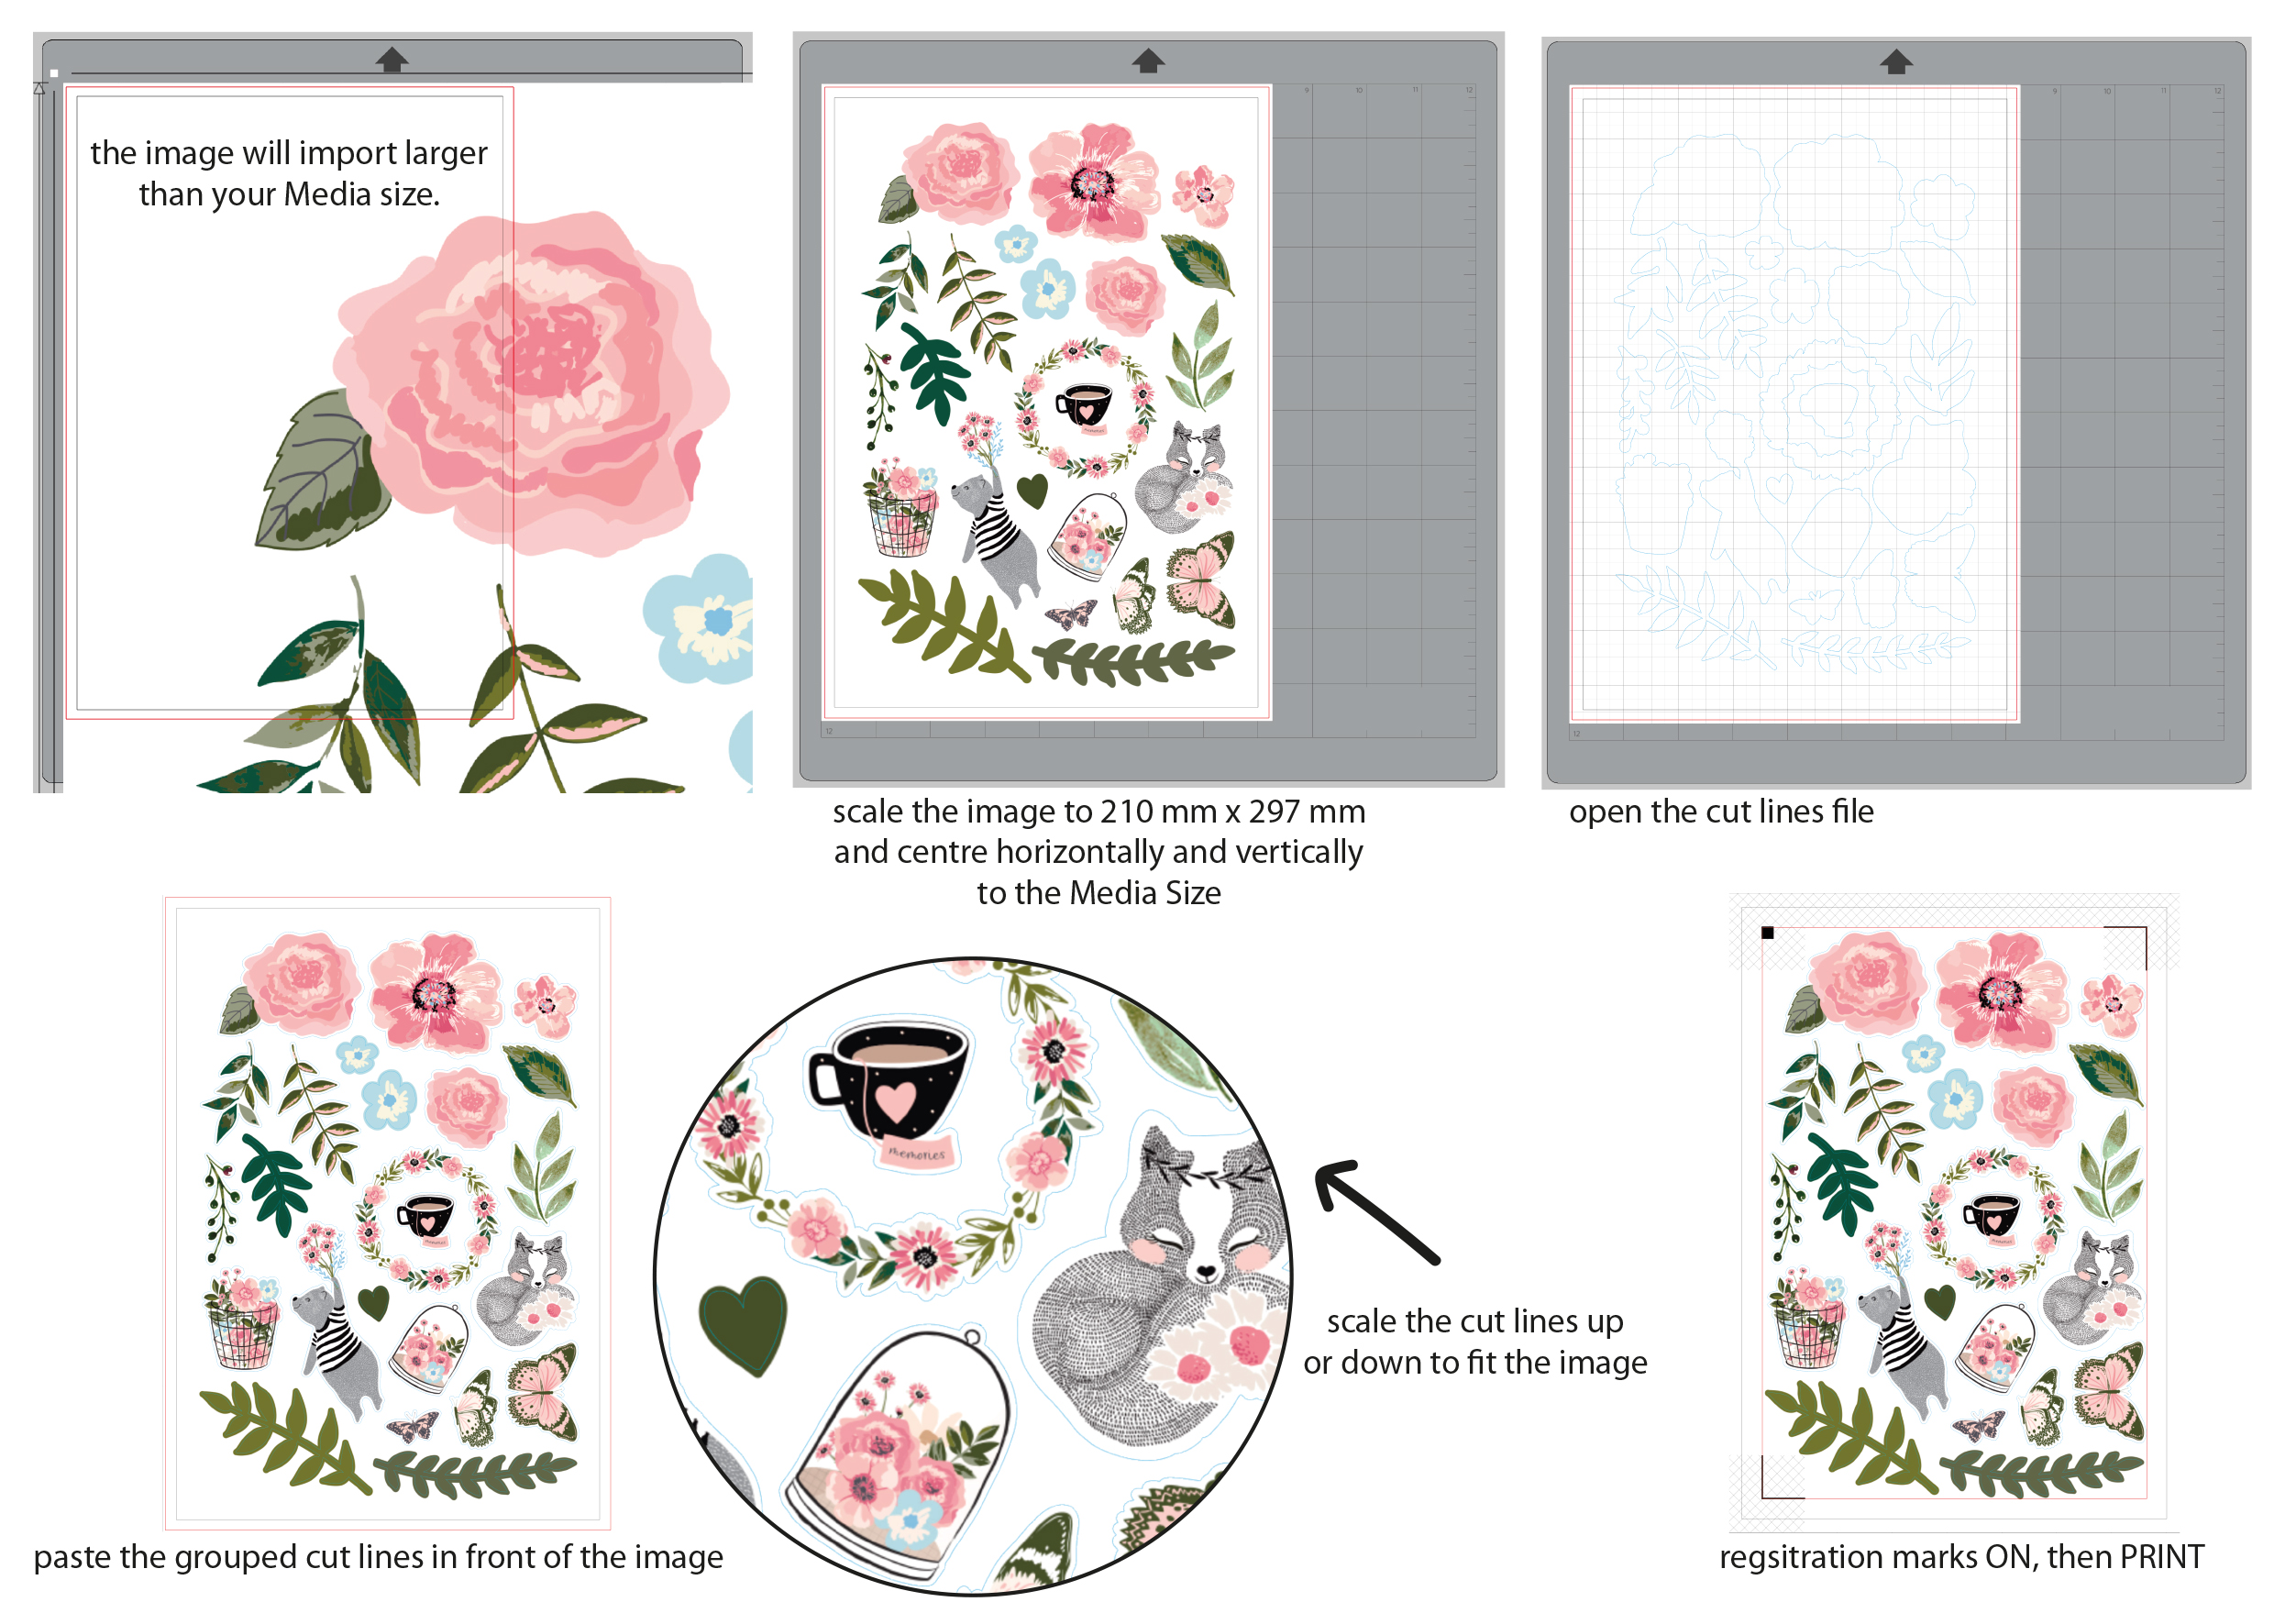
Centre the image on your Media Page. You can use the align function in Silhouette Studio (SS).
Now open the dxf file that has the same number. (e.g. RS RB Digital Diecuts-1.jpg and RS RB Digital Diecuts-1.dxf go together.) This will open another file/page in SS. It will be a fine outline of your diecuts shapes. This is your cutting line for your machine.
Select all the cut file lines and Group Selected Shapes, cut them and go back to your file/page with your diecut image in. Paste these cut file lines in FRONT of the image. You will then have to carefully scale up or down the cut file lines so that they match the image and you can see object with even amounts of bleed or white edge showing around the cutlines. You can scale the lines by dragging the top and bottom corners until you can see the lines evenly around your image.
Now in Page Setup, go to Registration Marks and select ON.
Print this file for cutting, the image and registration will print out, but the cutlines won’t.
Stick this printout onto your cutting mat. Always allow the top and left mat border to just peek out from under your printed page.
Once the mat and printed page are inserted into the cutting machine and you have selected SEND, the machine will look for the printed registration marks so that it cuts out the designs correctly.
You can see in the image of the registration marks, that there is a clear space around them. This is so the machine can see them and work out exactly where to cut. As long as you always have the cross hatched area free of other images, you will be able to get the cutting machine to recognise where your images are and cut them using the lines you have placed in the file.